It is easy to bleed the brakes if you have a helper who can step on the brake pedal. But what if you are alone and you need to bleed the brakes? You will have to gravity bleed the brakes.
To gravity bleed brakes, you have to take the lid off the master cylinder and just let all the brake fluid drain down by the force of gravity to an oil receptacle. In most cases, you have to loosen the wheel cylinder or caliper that is farthest to the master cylinder to bleed the air bubbles trapped in the brake lines.
The easiest and safest way to bleed brakes is to allow gravity to do the work for you. This gravity bleed method can work for almost all modern cars as long as the brake master cylinder is above the level of all four wheels and high up on the firewall.
How to do gravity bleed brakes alone? In this article, we’ll walk through these 7 steps to gravity bleed your brakes:
Jack the Car
Find the Brake Fluid Reservoir
Attach the Plastic Tubing
Release the Trapped Air Bubbles
Close the Bleeder and Top Up the Reservoir
Bleed the Remaining Brakes
Test Drive and Troubleshoot
Read on to learn more about how to gravity bleed brakes alone, in 7 steps.
Gravity Bleed Brakes
When gravity bleeding brakes, you take the lid off the master cylinder and then allow all the brake fluid to drain down by the force of gravity to an oil receptacle. This will also bleed off the air that is trapped in the brake lines.
In most cases, you have to loosen the wheel cylinder or caliper that is farthest to the master cylinder to bleed the air bubbles in the brake line. Do the same to the opposite rear cylinder, then the cylinder at the left front, and lastly, the cylinder at the right front.
Bleeding brakes through gravity is just allowing the force of gravity to do the work for you. This bleeding method can work in any modern car if its master cylinder is higher than the level of the wheels or is elevated on the firewall.
Preparation Before Gravity Bleeding the Brakes
Do the following before you start to bleed the brakes of your car:
Ensure that your car is parked on a level surface;
Wear a pair of protective gloves. This will protect your hands from the harmful effects of the brake fluid. This fluid is caustic. Don’t touch it or let it wet your clothes. Never allow it to get in contact with the surface finish of your car;
Use a jack for lifting and removing the wheels; and
Don’t throw the old brake fluid down the drain or anywhere. Dispose of it properly.
Prepare the following before you start:
One quart of brake fluid
One automotive jack
Four jack stands
A pair of vise grips
A rubber mallet or hammer
One open-end wrench (for bleed valve)
Five feet of 3/16 inch plastic tubing
Masking tape
One empty quartz container or jar
How to Gravity Bleed Brakes Alone
Gravity bleeding is relatively easy. If you are fond of DIY projects, you can do it. But since you are lifting a heavy object and working under it, you must always be very careful as you go.
Here are the steps on how to gravity bleed brakes alone:
1. Jack the Car
Use the car jack to raise the car slightly from the ground. After jacking up one wheel, use a jack stand to support the weight. Jack the rest of the three wheels and support each of them with their respective jack stands. Ensure that your car is evenly balanced on all four stands.
As you remove a wheel, you will see the brake caliper. This is the part where you will perform the gravity bleeding procedure. Perform this procedure properly from the rear wheels going to the front wheels, one by one.
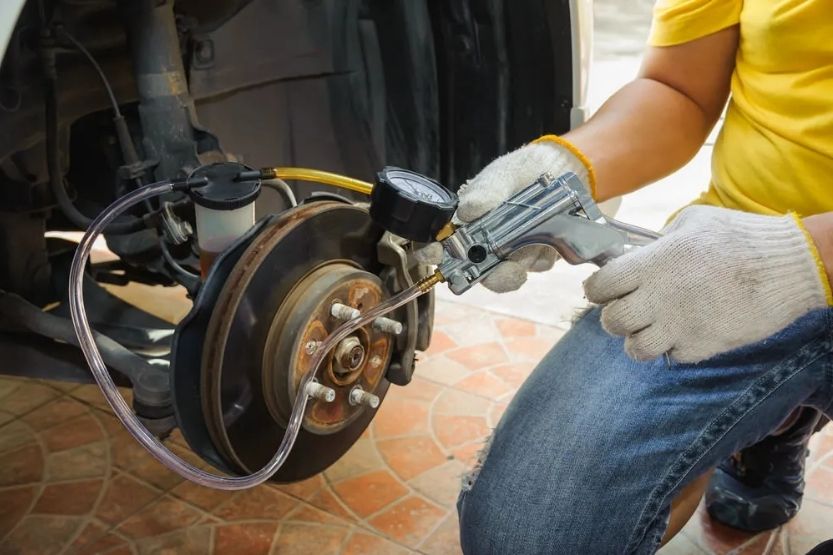
2. Find the Brake Fluid Reservoir
Work with one wheel at a time, starting from a rear wheel, either the left or the right. It should be the farthest from the master cylinder. Find the reservoir of the brake fluid. It is close to the brake caliper.
Use the vise grip to remove its caps and covers. Do it carefully. Ensure that you don’t damage anything. When the bleeders start to bleed out, brake fluid, tighten the caps. Old calipers usually have M7 bleeders. You can loosen them easily by using the vise grip.
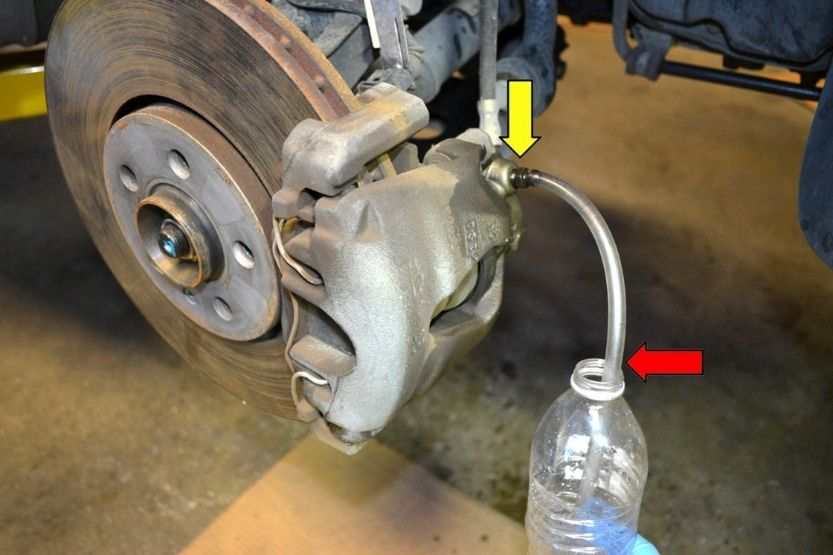
3. Attach the Plastic Tubing
Attach the plastic tubing to the bleeder and lift its other end above the brake fluid reservoir. To make the bleeding more efficient, extend the plastic tubing to a higher level above the brake fluid reservoir.
You don’t have to hold the plastic tubing in place while the bleeding takes place. Use the masking tape to secure the plastic tubing to the c-pillar or the roof of your car’s under chassis.
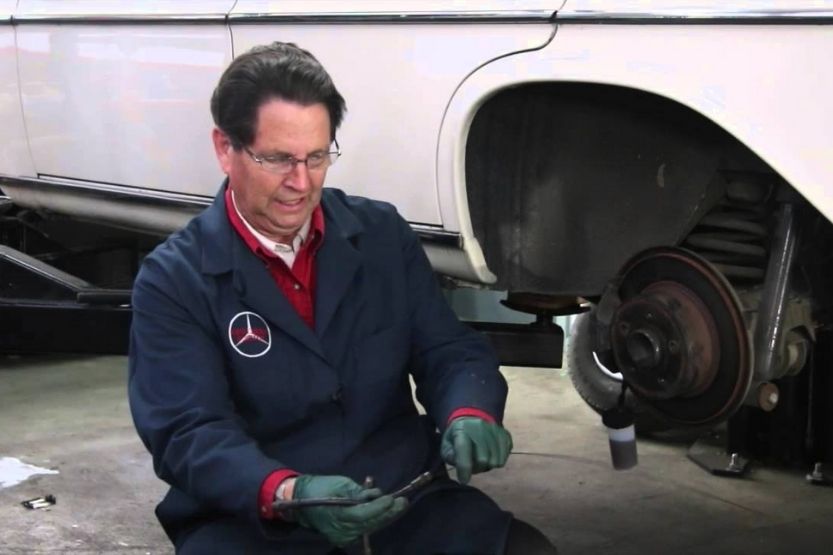
4. Release the Trapped Air Bubbles
Be very careful as you take this next step. If you make a mistake, you may have to start all over again. Use the open-end wrench to open the bleeder’s nipple carefully. As soon as this nipple is opened, brake fluid will start to rise in the plastic tubing.
As this happens, you will see the trapped air bubbles escaping until it reaches the height or level of the brake fluid reservoir. Be patient because this process is rather slow. It usually takes from 3 to 4 minutes for this process to end.
Get the rubber mallet and tap the brake calipers. It will make the gravity bleeding process faster. This will also improve the effectiveness of the process because it helps the air bubbles to rise through the plastic tubing until all of them are removed.
5. Close the Bleeder and Top Up the Reservoir
If you are sure that all trapped air has been removed on the first rear wheel, you need to tighten its bleeder and remove the plastic tubing attached. Use the wrench to close the bleeder. Before you do this, place the jar below the nipple so that it can catch the dripping brake fluid.
You might remove some brake fluid at the reservoir. So if the brake fluid in the reservoir is below its required limit, top it off with new fluid. Always remember that you need to monitor this fluid during the process of bleeding. It needs to be always full while you are still doing the process.
It is better to have someone do the monitoring for you while you are doing the bleeding. They can do the topping up while you are doing the bleeding.
6. Bleed the Remaining Brakes
Repeat the same procedure in bleeding out the trapped air in the three remaining brakes. Follow the recommended sequence as mentioned above. After bleeding one brake, ensure that the brake fluid level is topped up each time.
This will prevent more air from sneaking into the braking system. Follow the general rule of bleeding until the brake fluid is clear of all air bubbles. This may take time, but you have to do it to ensure no air bubbles are trapped in the system.
7. Test Drive and Troubleshoot
After completing the entire bleeding process on all four car brakes, take it out for a test drive. As you drive, push your foot on the brake pedal. If the feeling is firm when you depress the pedal, then you have done a great job. You have gravity bled the brakes of your car.
In addition, if the brake pedal holds constant pressure without dropping, then the job you did is perfect. However, if the brake pedal still feels spongy and mushy, it means there is another problem. Maybe the problem is the Master Cylinder. It might also be full of air, or it may even be defective. And that is another story. You still can’t drive your car until this problem is fixed.
What Is There to Bleed?
You yourself can bleed your brakes because it is considered a DIY car repair. Primarily, you are bleeding out the air bubbles that are trapped in the brake fluid in any one or all of the brake lines. The only way to bleed out this trapped air is by draining the brake fluid on all the brake lines on all four wheels of your car.
Perhaps you are wondering how air bubbles get trapped in your brake lines. It seems mysterious at the outset since the brake lines are supposed to be tightly sealed. However, the air has the capacity to sneak into tight enclosures in ways that you don’t suspect.
Air can sneak in during repairs, maintenance service, and sundry things that are routinely done to your car. And it can steal its way into the brake lines if there is a leak in the system. Air can also enter stealthily in the braking system if the wheels’ brake pads are old and worn out.
Whatever the case, the only way to get this air out of the braking system is to bleed the brakes. You won’t be able to do that unless you also drain the brake fluid since it is the medium where the air bubbles are trapped.
Why Is There a Need to Bleed the Brakes?
You need to bleed the brakes because the air trapped in your brake line will increase your risk of a terrible vehicular accident.
How Do You Know That Air Is Trapped in the Braking System of Your Car?
The moment you start to feel that the brake pedal is getting soft, and if you notice that your car’s stopping power is diminishing, trapped air in the braking system could be the culprit. You should address this problem immediately because your life is at risk. Driving a car with faulty brakes does endanger not only you but also the pedestrians and other motorists.
As a safety measure, you should regularly perform brake bleeding on your car and not only when you feel your brake pedal is getting soft. It is a preventive maintenance chore that you should do once every two or three years.
Another way of putting it is: you need to bleed the brakes every 20,000 miles. You should also do it every time you have the brake pads, the brake lines, and the brake calipers repaired or replaced. Always follow this rule to avoid getting into a car accident.
That means you should perform brake bleeding regularly as long as you are using your car. As you continue driving your car, it will eventually cover thousands of miles. In the process, small quantities of air can sneak in and get trapped in the brake lines over time. If enough air is trapped in the system, you will get that spongy feeling every time you step on the brakes.
Every automotive fluid must be checked regularly, including the brake fluid. The brakes are the most important safety feature of your car. They will only work efficiently if there is no problem with the brake fluid. Air trapped in the brake fluid makes it inefficient. It won’t do its job well.
Why Does Air Get into the Brake Line?
The brake fluid that you use in your car is hygroscopic. It means this fluid absorbs water from the air. When water finds its way into this fluid, it will lower the boiling point of the fluid.
When the fluid boils, water will escape the brake line as steam. With this low fluid flowing in your brake line, your brake pedal will feel spongy. You will also see black goo that will develop in the brake fluid canister. This goo is corrosive and can even give way to the entry of more air into the braking system. If left unchecked, there’s a risk of your brake being broken.
Conclusion: How to Gravity Bleeding Brakes Alone
In gravity bleeding, you need to take the lid off the master cylinder and then allow all the brake fluid to drain down by theforce of gravity to a receptacle. That will bleed off the air bubbles that are trapped in the brake lines.
In most cases, you need to loosen the wheel cylinder or caliper that is farthest to the master cylinder to bleed the brake fluid. Do the same to the opposite rear cylinder, then the cylinder at the left front, and lastly, the cylinder at the right front.
How to do gravity bleed brakes alone? Here’s how you can gravity bleed brakes alone in 7 simple steps: