How Long Does It Take to Bleed Brakes? [Full Guide]
Bleeding brakes helps return your vehicle’s brake system to optimal performance. But to bleed brakes correctly, it is important to know how long to bleed them for. How long does it take to bleed brakes?
It takes about 10 to 15 minutes per wheel to bleed your brakes. Since there are four brake lines, it would take you around 30 minutes to bleed your brakes for the entire vehicle.
The procedure is simple, but you need one person to assist you, as someone should press on the brake pedal while you’re doing the process.
Read on to learn more about how long it takes to bleed the brakes on your car or truck.
How Long Does It Take to Bleed Brakes?
It takes about 10 to 15 minutes per wheel to bleed your brakes. Since there are four brake lines, it would take you around 30 minutes to bleed your brakes for the entire vehicle.
Bleeding your brakes is crucial to allow your brake pedal and vehicle to function correctly. It’s quite a simple procedure that you could do within, more or less, 30 minutes. Here are the steps on how to bleed brakes.
1. Prepare and Organize the Materials You Need
You will need the following materials to bleed your vehicle’s brake:
One can of brake cleaner fluid
A disposable bottle
One clear plastic tubing
One bleed block
Four jack stands or one car lift
Bleed kit (syringe and other materials)
Proper brake cleaner
One combination wrench
Paper towels
Protective gear
2. Wear Protective Gear
Brake fluid is highly corrosive, so always wear protective gear, such as thick gloves and an appropriate apron. Clean all brake fluid traces after bleeding, taking care not to get it in your hands and skin.
3. Insert the Bleed Block after Removing the Brake Pads
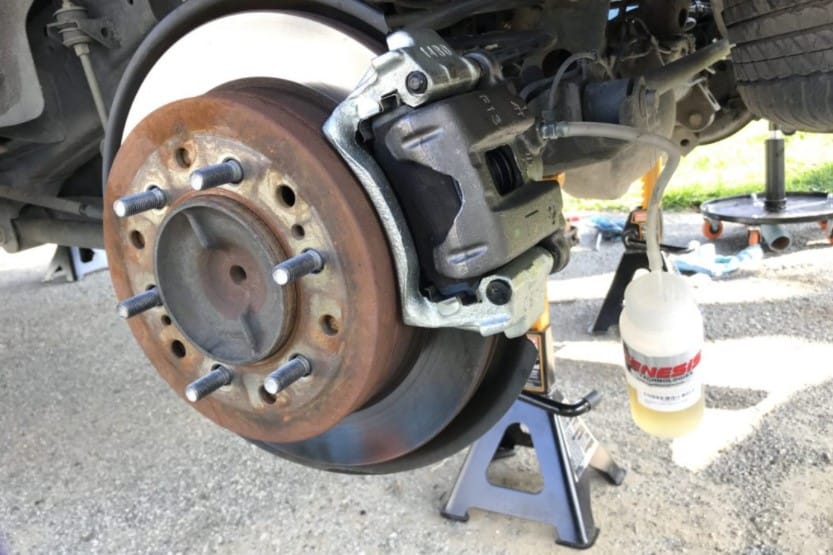
Behind each brake, find the bleeder screw. You may want to use a creeper so that you can lie down comfortably. Remember to cover your floor with layers of newspaper to prevent the brake fluid from oozing to your floor and causing damage.
4. Loosen the Screw Using a Suitable Wrench
Loosen the screw carefully so as not to break it. Start with the passenger rear brake first, followed by the driver’s rear brake and the passenger front brake, before finally doing the driver’s front brake.
Carefully insert the bleed block after you remove the brake pads. Ensure that you insert the bleed blocks securely and adequately.
5. Connect the Syringes and Move the Fluid
Connect the syringes to the lever and caliper, then move the fluid from the caliper into the lever syringe. If you’re using plastic tubing and a disposable bottle, use the same principle of removing the air bubbles by attaching the hose to the end of the bleeder screw.
Place the other end in the plastic bottle or appropriate container. Cover the end of the hose in the jar by placing the brake fluid.
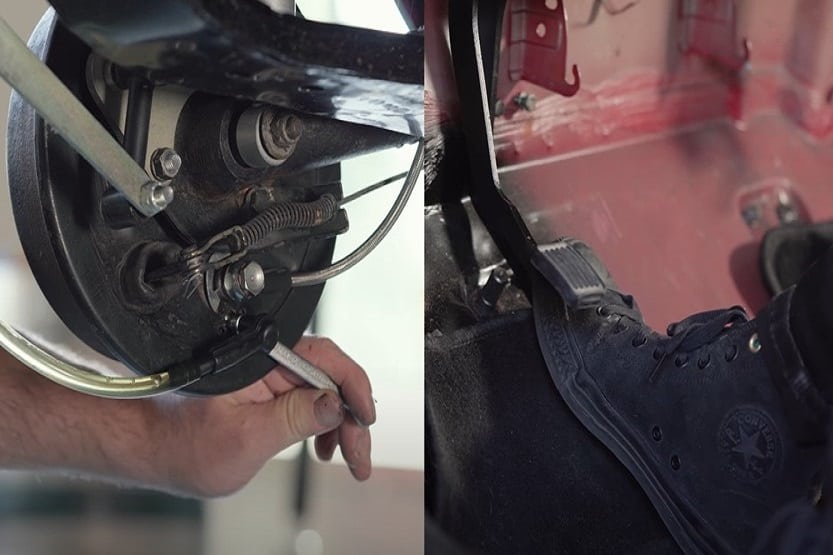
6. Pump the Brake Pedal
This step is where you would need your friend’s help. Ask the person to slowly step on the brake pedal several times, telling you when the pedal is up or down. When the person steps down on the pedal, open the bleeder screw.
7. Brake Fluid and Air Bubbles Will Squirt Out
Be careful and ready when you open the bleeder screw as brake fluid and air will squirt from it. You can now remove the air bubbles that come with the brake fluid into the plastic bottle, jar, or lever syringe. Your assistant must not release the pedal brake while you’re doing this.
You will know that you have removed all air when the brake fluid coming out no longer contains air bubbles but only brake fluid. You can then withdraw the hose.
8. Close and Tighten the Bleeder Screw
Next, close the bleeder screw and tighten it correctly. You can then instruct your assistant to release the brakes. If you used a syringe, remove it and wipe any excess brake fluid.
9. Repeat the Procedure
You have to repeat the procedure until no air comes out with the brake fluid. Ascertain that you have enough brake fluid by replacing the volume lost.
Take note to open only the bleeder screw when your assistant is pressing down on the pedal. If the person releases the pedal before you’re able to close it, air bubbles will return inside the container.
10. Proceed to the Rest of the Brake Lines
After bleeding each brake, remember to check the master cylinder’s brake’s fluid level so that it stays above the indicator line or indicates ‘full.’
Your brake pedal should no longer feel spongy after you have eliminated all the air from each brake line.
How long to bleed brakes? The procedure could take you shorter than 30 minutes when you get used to it.
See the below video for how to bleed brakes:
When Should I Bleed Brakes?
One of the first signs that you need to bleed your brakes is when your brake lever feels spongy. You can bleed your brakes annually if you don’t encounter the spongy brake lever before a year.
But if your brake is spongy before you reach one year, you have to immediately bleed your brakes. Ignoring your brakes’ squishy feel could lead to accidents.
Reasons Why Brakes Won’t Bleed
You would spend a long time bleeding your brakes if they didn’t bleed because of improper procedures. Here are the reasons why your brakes would not bleed.
1. Caliper Fault
Your brakes won’t bleed because your caliper is faulty. Its seized sliding pins may have damages, or the seals are already leaking.
Many calipers are free-floating and fixed pins may cause problems. You would know that a caliper is fixed in its position when it doesn’t move when you lever the piston.
2. Flex Hose Fault
The flex hose carries brake fluid to the caliper. So when it’s damaged, the fluid transfer gets disrupted. Find out if the hose is blocked, corrupted, or is leaking. Check also for internal hose damage.
3. Bleed Screw Fault
You can easily damage the bleed screw due to forcible pressure. When removing the screw, use suitable tools and do it cautiously. When you damage the screw, air and moisture can quickly lean inside.
Corroded bleed screws can, likewise, drew air and water in, making it hard to bleed. They could also be blocked or corroded. So, check these things out.
4. Caliper Incorrectly Fitted
When you fit calipers, ensure that you have fitted the right and left caliper correctly. You may swap one from the other, causing problems.
Incorrect placement of the calipers will affect your bleed screws. You will know which caliper is for the right or left through their markings. The caliper for the left is marked “L” and “R” for the right.
5. Faulty Bleeding Procedure
Double-check that you’re doing the correct bleeding procedure. If you’re unsure of your procedure, you can take your vehicle to the nearest motor shop for certified car mechanics to do the bleeding process.
How long does it take to bleed brakes? It takes about 10 to 15 minutes per wheel to bleed the brakes. Since there are four brake lines, it would take about 30 minutes to bleed the brakes for the whole car or truck.
We’ve answered how long it takes to bleed brakes and discussed when to bleed brakes, including the reasons why brakes won’t bleed. Next, let’s look at some tips for bleeding brakes.
Tips for Bleeding Brakes
Bleeding brakes could be a tough job if you don’t know how to go about it. Here are some pointers that would help you do your task correctly.
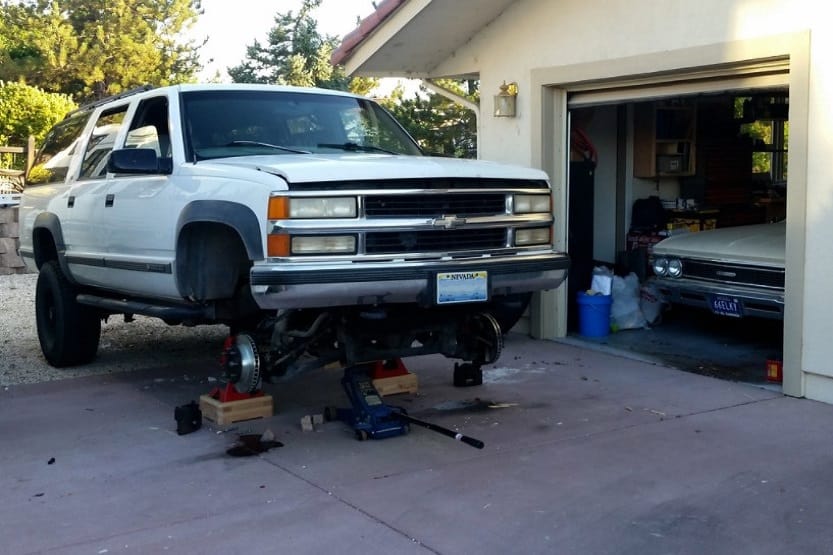
1. Ensure That Your Vehicle Is Secured Before Doing the Procedure
Position the vehicle in a secure place where it won’t roll on the road or collapse accidentally. Use jack stands or a car lift. Don’t remove the wheels, so they can support the vehicle while you’re under it. You wouldn’t want the car pinning you down in case it collapses.
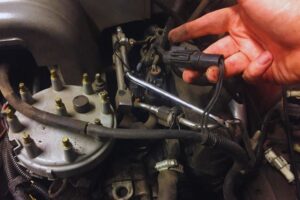
2. The Master Cylinder Must Be Full
When bleeding your brakes, the master cylinder’s brake fluid must be full before each bleeding procedure. If it’s not entirely up to the mark and gets dry, you will have to perform this for a longer time. You will have to bleed the master cylinder aside from the brake lines.
3. Clean Up Immediately
Every after bleeding each brake, clean up immediately to prevent brake fluid from damaging other areas. Brake fluid is highly corrosive, toxic, and could be flammable. It can increase the risk of the wear and tear of your machines or materials.
4. You Must Bleed Each Brake after Replacing the Pads
You have to bleed the brake every time you replace the pads or discs. This will change some of the old brake fluid. You can also replace the brake fluid so that you can do two tasks simultaneously.
5. You Need Another Person to Bleed the Brakes
The other person’s task is to apply brake pressure inside the car as you bleed the brakes. When the person presses the brake pedal, you let out the air bubbles. But you can also do it alone.
6. Tapping Is Another Way to Dislodge Air Bubbles
The purpose of brake bleeding is to get rid of air bubbles in the brake fluid. Did you know that simple tapping of the caliper can help dislodge trapped air bubbles?
Try it next time you bleed your brakes. Take care, though, that you tap the caliper firmly but gently with a suitable material.
7. Avoid the Pads Coming in Contact with the Brake Fluid
When the brake fluid touches the pads, they become useless. So, avoid this incident from happening. Also, be careful when replacing your brake fluid with the pads nearby. The fluid can damage many things it comes in contact with – even your vinyl floors and carpets.
8. Use Paper Towels Around the Caliper and Lever
Brake fluid is dangerous, so you should clean as you go. Wipe the area immediately around and below the lever and the caliper with paper towels. Discard used towels and use a new one with each wipe.
Use several layers of newspapers to protect your floor. Even a small amount of brake fluid can cause damage and corrosion.
9. Spongy Brakes Mean It Is Time to Bleed Them
A spongy, squishy, or loose brake lever indicates that air is present in the brake fluid, so it’s time you have to bleed them. Don’t procrastinate, as the damage to your vehicle may get bigger.
10. Use the Correct Brake Fluid
Ensure that you’re using the correct brake fluid for your vehicle. The use of incorrect fluids would destroy your master cylinder and brake lines. Refer to your vehicle’s user manual, or call the motor company where you bought your car.
11. You Can Use Gravity Bleeding
You will need a longer time for this method, but you bleed all four brake lines simultaneously. All you have to do is check the master cylinder so that it’s full, connect the four brake hose, and four catch bottles at once. Bleeding occurs without you having to pump the brake pedals.
How long does it take to gravity bleed brakes? It should take about 40 minutes to gravity bleed brakes. This method is a bit longer than regular brake bleeding.
Through time, your brake fluid would get contaminated with water, air, or dirt. Regularly replacing it would lengthen the life of your vehicle. Avoid mixing different fluids even though they are all brake fluids.
13. You Can Bleed Without an Assistant
The principle is the same; just ensure that the catch bottle is above the bleed hose level. Your bottle must contain at least ¼ of fresh brake fluid before opening the bleed screw. You can then pump the pedal several times until air is eliminated with the old brake fluid.
Conclusion – How Long Does It Take to Bleed Brakes?
It should take about 10 to 15 minutes per wheel to bleed your brakes. Since there are four wheels, it would take you around 30 minutes to bleed the entire vehicle’s brakes.
Simply put, the task involves pushing the pedal; opening the bleeder screw to allow air to come out; closing the screw, releasing the pedal; and repeating these steps until you have eliminated all air bubbles from all line brakes.
When you’re used to the procedure, it will take you a shorter time to bleed your brakes.