
Snow chains are important accessories for your tires in the winter, but they can be a challenge to put on. How to put on snow chains?
The 5 general steps of putting on snow chains are as follows:
- Find a Good Parking Spot
- Know Which Tires to Put Them On
- Lay the Chains on the Ground
- Drape and Connect
- Drive Forward
Snow chains should be positioned on the front tires of a front-wheel-drive car or truck; or the rear tires of a rear-wheel-drive car or truck. For all-wheel-drive (also called four-wheel drive or 4WD) cars, it’s a good idea to put the chains on the front tires for maximum steering traction.
Read on to learn more about how to put snow chains on your tires.
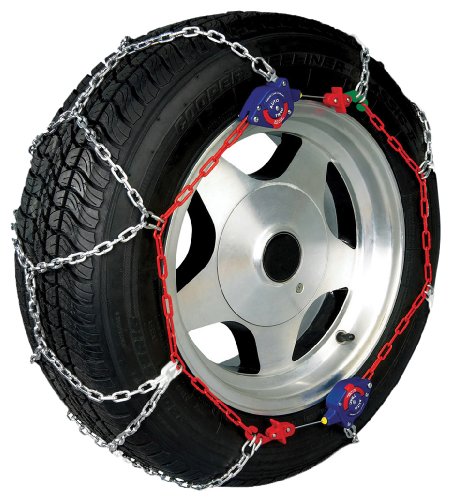
Also, for excellent snow chains, take a look at the Peerless Auto-Trac Tire Traction Chains. These chains include self-tightening ratchets that provide automatic tightening and centering. They are a breeze to install and remove.
Click here to see it on Amazon.
How to Put on Snow Chains?
Not all snow chains are the same. For example, their chain link pattern can either be a diamond, diagonal, ladder, or square. Some snow chains are placed over the top of the tire, relatively centered. Others need to be laid out on a flat surface before driving forward over the chain.
For this article, we’ll go through the steps for installing a diamond-shaped snow chain. Remember, this is only a general guide. Always read and follow the instructions on the manual or instruction guide of the snow chains you have.
1. Find a Good Parking Spot
It might sound like common sense, but it’s something worth repeating. After all, it’s vital to your safety.
Try getting as far off the road as possible once you deem it necessary to install snow chains. You should park on the road shoulder or a big, unoccupied parking lot. Make sure the ground is flat and firm. If you’re driving with someone, it’s a good idea to have them act as your lookout.
2. Know Which Tires to Put Them On
Does your car have a front-wheel drive or rear-wheel drive setup?
The rule is pretty simple. If your car has a front-wheel drive setup, then the snow chains go on the front tires. And if it’s a rear-wheel drive—you guessed it—then the snow chains go on the rear tires.
What if your car has an all-wheel drive setup?
There are different answers to that question. Some say it’s best to put snow chains on all four tires to get maximum traction and balance during extreme weather conditions. Others say they should go on the front tires. To know for sure, please consult your owner’s manual.
Note: Check also your state’s laws regarding the number of snow chains you’re allowed to use.
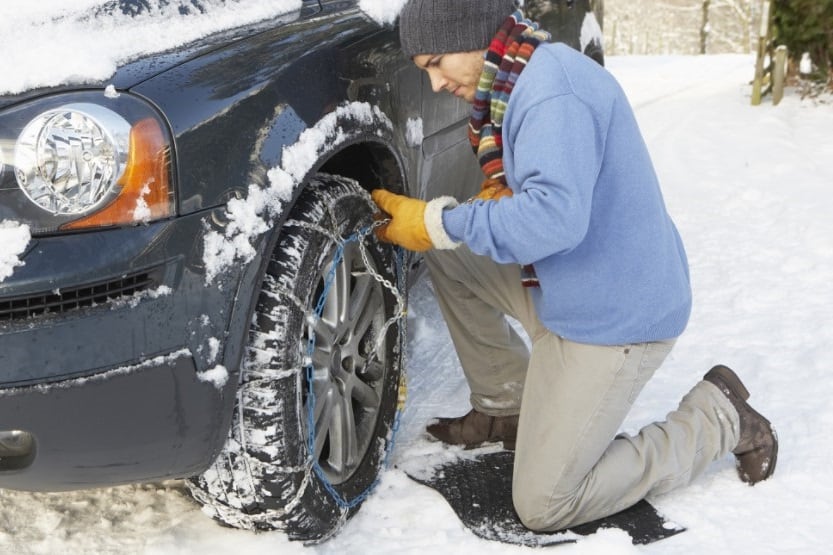
3. Lay the Chains on the Ground
Before putting on the snow chains, don’t forget to wear your gloves and snow goggles. They can protect your hands and eyes from the cold. And put something on the ground to kneel on so you don’t get your clothes wet from the snow. That could be a car mat, a plastic bag, or the plastic instruction sheet that comes with the snow chains.
Now, it’s time to take out your first snow chains and instruction sheet. There should be two snow chains in every bag or box. Undo any twists in the chains, so they’re hanging loosely in a web shape.
Hold up the blue end with your right hand and the yellow end with your left hand. Carefully lay the separated chains on the ground beside the tire you’ll be working on.
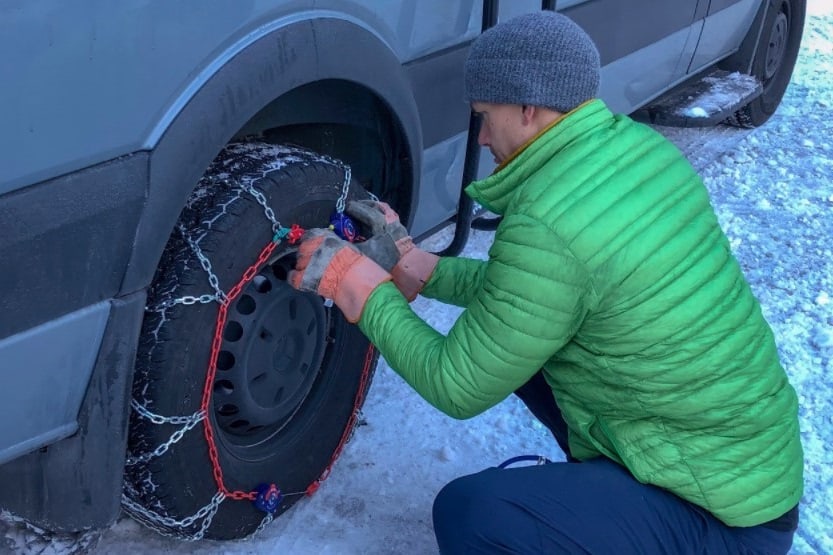
4. Drape and Connect
After laying the chains on the ground, slip them behind your tire from the right side towards the left. Push the part of the chain with a yellow end behind the tire until the chain is centered.
Note: The pointed parts of your snow chains should be facing away from your tire to prevent damaging it.
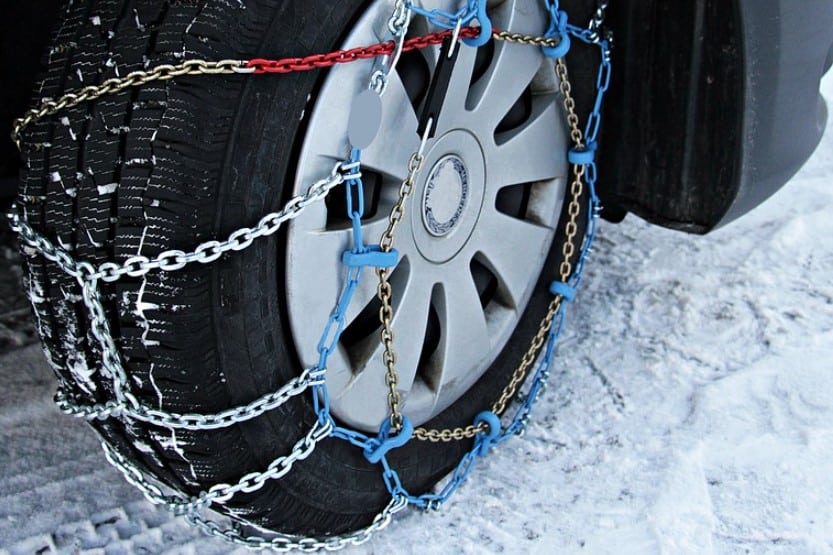
Join the ends together on top of your tire by sliding the blue end into the yellow end. Tug both ends into place. (For some snow chains, the fastening system could be in the form of clips, hooks, and loops.)
Next, grab the outer hook (could be green or red in color) that’s directly opposite the cable connection on top of your tire. Connect it to the nearest chain link on the opposite side.
Check: The chains on the tire tread should form a diamond shape. Also, the center trail—a piece of straight chain that’s found between the diamond-shaped chains—should be positioned on the inner tread.
At the bottom, you’ll find a red draw chain with a bungee cord. Pull that chain as tight as you can using both of your hands, then guide it through the guide loop to lock it into place. Insert the loose end of the red chain with a bungee cord through one of the loops, and then attach it to a side chain on the opposite side.
Repeat these steps on the other tire.
5. Drive Forward
Perform this step once you’ve properly installed all two or four chains. When it comes to how far you should drive your car forward, opinions vary. Some suggest driving it at least one car-length forward, while others suggest half a wheel rotation.
Whatever it is you find convenient, the fact remains that you shouldn’t skip this step. This would give you the chance to assess if your snow chains need re-tightening. If it does, here’s how to do it:
- Unhook the part of the red draw chain with a rubber end. Pull that tight.
- Once you feel it’s tight enough, insert the chain again through the red loops.
- Secure the bungee cord to the nearest side chain opposite the red loops.
For excellent snow chains, take a look at the Peerless Auto-Trac Tire Traction Chains:
These chains include self-tightening ratchets that provide automatic tightening and centering. They are a breeze to install and remove.
Click here to see it on Amazon.
See the below video for how to install these quick-fit snow chains:
How to put on snow chains? Follow these 5 general steps:
- Find a Good Parking Spot
- Know Which Tires to Put Them On
- Lay the Chains on the Ground
- Drape and Connect
- Drive Forward
Next, let’s look at some important tips to make your snow chain install a breeze.
Tips for Installing Snow Chains
1. Practice
Practice indeed makes perfect. You don’t want it to be your first time to put on snow chains to your tires when the winter weather changes for the worse.
Before you drive on snow-covered and possibly slippery roads, practice installing your new snow chains in the comforts of your dry driveway or garage. If you do this, you’ll have the chance to check if your chains are the right size, solve any issues, and get used to a proper snow chain install.
2. Get Help
It’s not a requirement, but it would certainly make it easier and faster to install snow chains if you have another person to help you out. That person could also keep watch to ensure your safety, especially if you’re stuck on a busy road or in some remote area.
3. Apply Your Parking Brakes
The last thing you’d want is your car rolling because you forgot to leave your parking brake on. So, don’t forget to do this when installing your chains. Plus, place a block, brick, rock, or any big and heavy object under the tires you’re not working on.
4. Know When to Use Them
Know when to use them by learning about the snow chain laws in your state. At the risk of stating the obvious, the best time to use snow chains is normally during or after a blizzard or snowstorm or when the road is covered in ice. There should be at least an inch or two of snow on the road to prevent damaging your tires and road.
5. Know Where You Can Use Them
Are you legally permitted to use snow chains in the state where you’re living in, or where you plan to drive to?
Each state has its own regulations regarding when you can or can’t use snow chains. In general, however, most states allow or require people to use them of “reasonable proportions” during certain periods of the year or whenever necessary for safety because of conditions that may cause a vehicle to skid on icy or snowy roads.
The following states have identical regulations that permit the use of this device to help you and other passengers to stay safe during hazardous conditions:
- Alabama
- Arizona
- Arkansas
- Illinois
- Iowa
- Kansas
- Louisiana
- Michigan
- Minnesota
- Mississippi
- Nebraska
- New Mexico
- North Carolina
- Oklahoma
- Rhode Island
- South Carolina
- Texas
- Virginia
- West Virginia
- Wisconsin
Some states impose more restrictions on the use of chains, such as California and Colorado. So, again, if you’re not completely sure, contact your state’s transportation agency before you buy them.
6. Make Sure Your Car Has Enough Clearance
You need to know this because it will determine the chain size that’s appropriate for your tires. Without enough clearance, there’s a risk that snow chains could damage the wheel well, brakes, undercarriage, and other surrounding structures.
Manufacturers often mention clearance problems associated with their cars in the owner’s manual. Vehicles (cars, SUVs, pick-ups, etc.) manufactured since the ’80s will most likely have special clearance requirements. So, ensure to check your owner’s manual.
To give you an idea, 9-millimeter snow chains would need at least 15 millimeters of space between the inside edge of your tire and wheel arch. If you’re planning to buy a 16-millimeter snow chain, make sure you have at least 21 millimeters of clearance.
Caveat: Some, if not most, problems about clearance are not easily found in plain view. Don’t just focus on the position of your tires on your car. Check the parts behind your car tires (brake lines, splash guards, strut housing, etc.).
7. Know Your Tire Size
Snow chains are usually sold to match a specific tire size. By now, you probably know that loose-fitting and tight-fitting snow chains can be ineffective, destructive, or worse, accident-prone.
If it’s your first time doing this, it’s relatively easy to find your tire size. On the sidewall of your car tire, you’ll find a jumble of letters and numbers.
Let’s take P205/55R19 as an example. The letter “P” stands for passenger vehicle tire. The number “205” refers to the tire width (from sidewall to sidewall) in millimeters.
Expressed as a percentage, the number “55” refers to the aspect ratio (height of the sidewall). And the number “19” refers to the wheel diameter.
Do you have to buy snow chains that are the exact size? Ideally, yes. But not all recommended chain sizes would fit the tires perfectly. That’s why you should always fit your chains and test them on a slippery or snowy road before you actually need them.
4 Benefits of Snow Chains
Why use snow chains (or winter tire chains), not snow tires or snow cables? What are the top benefits of these devices?
1. Less Expensive
Compared to snow tires, winter tire chains are significantly more affordable. To give you an idea, the average snow tire price for a passenger car is between $100 and $150 per piece. Meanwhile, snow chains would cost around $40 to $100.
2. Provide Great Traction
This is probably one of the best reasons for using snow chains. They provide a great amount of traction, regardless if you’re driving on roads with deep snow or ice. They also make it a lot safer to turn a corner and drive in poor weather conditions.
3. Easy Installation and Removal
As long as you practice and you know how to follow instructions, you can easily install and remove snow chains within an hour or less. And what’s great about some of them is they have a self-tensioning feature, which allows them to automatically tighten and center as you drive away.
4. Strength
Ice-covered roads are no match for these devices. They’re so strong that they have no problem breaking through the ice, so you can have more control of your car and avoid being a danger to other people.
Conclusion – How to Install Snow Chains
How to put snow chains on your tires? To put on snow chains, follow these 5 general steps:
- Find a Good Parking Spot
- Know Which Tires to Put Them On
- Lay the Chains on the Ground
- Drape and Connect
- Drive Forward
Position snow chains on the front tires of a front-wheel-drive car. If you have a rear-wheel-drive car, install the chains on the rear tires. For all-wheel-drive (4WD) cars, it’s a good idea to put the chains on the front tires for maximum steering traction.
The installation steps and tips in this article serve only as a general guide. Since each brand of snow chains has its own unique features, it’s important to read the instruction sheet that comes with them, and if available, watch brand-specific installation videos.
Remember:
- Know your state laws for tire chains.
- Find a pair that’s the right size for your tires.
- Ensure your car has enough clearance for them.
- Practice installing them before you actually need to use them.
Related reading:


![Read more about the article How to Put Chains on Tires [Easy Steps]](https://roadsumo.com/wp-content/uploads/2022/01/how-to-put-chains-on-tires-300x200.jpg)

![Read more about the article Walmart Tire Installation Cost [How Much Do They Charge?]](https://roadsumo.com/wp-content/uploads/2021/02/Walmart-tire-installation-cost-300x200.jpg)