Dashboard lights are an important part of any vehicle’s safety features, as they provide drivers with essential information about the state of their car. However, when these lights stop working, it can be difficult to determine the cause of the issue.
One common culprit is a blown fuse, which can be easily replaced if the driver knows which fuse is responsible for the dashboard lights.
The location of the dashboard light fuse can vary depending on the make and model of the vehicle. Some cars have a single fuse box, while others may have multiple power distribution centers.
Drivers can typically find the fuse box or power distribution center by checking the area around the glove box, under the dashboard, or in the engine bay. Once located, the driver can check the fuse for any signs of damage, such as blackening or a broken filament.
Locating the Dashboard Light Fuse

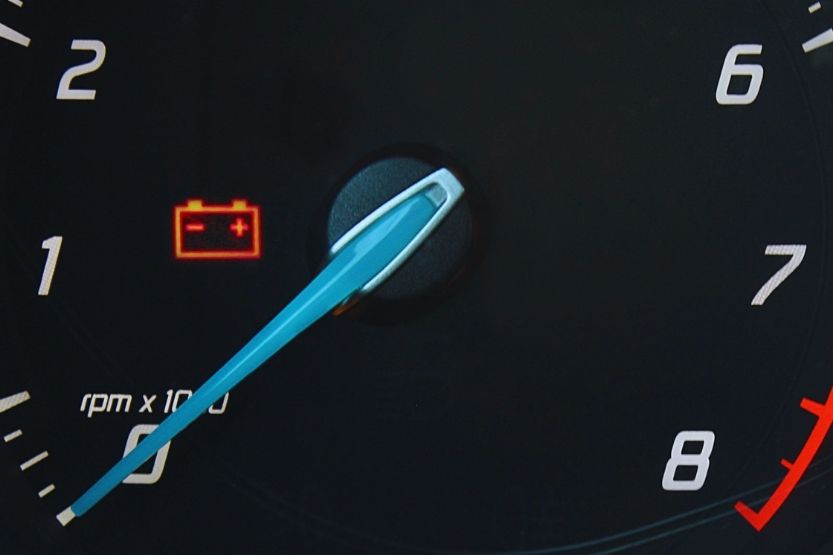
When the dashboard lights in your vehicle stop working, it could be due to a blown fuse. The dashboard light fuse is responsible for powering the lights on the dashboard, including the speedometer, fuel gauge, and warning lights. Here are a few steps to help you locate the dashboard light fuse:
- Step 1: Check your vehicle’s owner manual to find the location of the fuse box. The manual should also provide a diagram of the fuse box and the location of the dashboard light fuse.
- Step 2: Look under the dashboard on the driver’s side of the vehicle. The dashboard light fuse is often located in this area, along with other fuses that power various components of the vehicle.
- Step 3: Check the fuse box under the hood of the vehicle. Some vehicles have a separate fuse box for the engine components and another for the dashboard and interior lights.
It’s important to note that the location of the dashboard light fuse can vary depending on the make and model of the vehicle. If you’re having trouble locating the fuse box or dashboard light fuse, consult your vehicle’s owner manual or a mechanic for assistance.
Once you’ve located the dashboard light fuse, check to see if it’s blown or damaged. A blown fuse will have a broken filament or blackening on the inside. If the fuse is damaged, replace it with a new one of the same amperage rating. It’s important to use the correct amperage rating to avoid damaging the electrical system of the vehicle.
If replacing the fuse doesn’t solve the problem, it may be due to a faulty dimmer switch or a burned-out lightbulb. In this case, it’s best to consult a mechanic for further diagnosis and repair.
Checking the Fuse
Before replacing any parts, it is important to check the dashboard light fuse. This is a simple process that can be done with a few basic tools. Here are the steps to follow when checking the fuse:
- Locate the fuse box – The fuse box is usually located under the dashboard or in the engine compartment. Refer to the owner’s manual to determine the exact location of the fuse box.
- Identify the dashboard light fuse – Look for the fuse labeled “dashboard lights” or “instrument panel.”
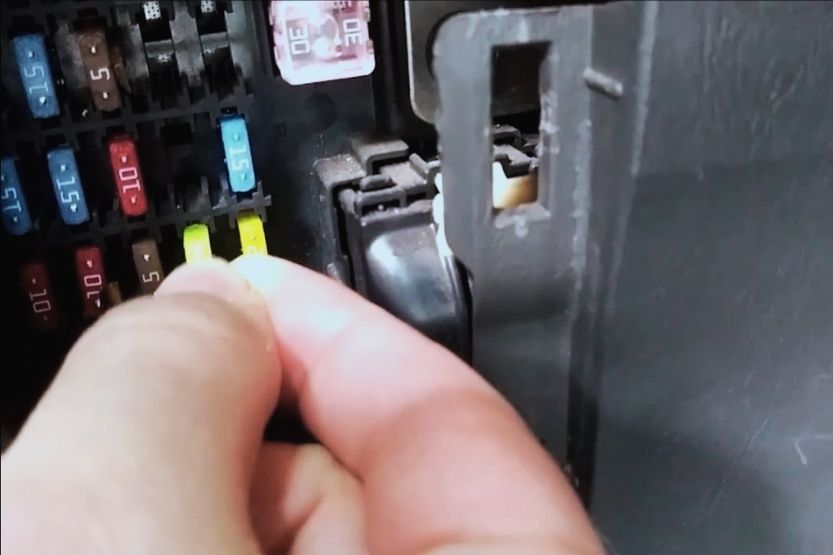
- Remove the fuse – Use a fuse puller or a pair of pliers to remove the dashboard light fuse from the fuse box.
- Inspect the fuse – Hold the fuse up to the light and check for any signs of damage or burn marks. If the fuse appears to be intact, use a multimeter to test the fuse for continuity.
- Replace the fuse – If the fuse is damaged or has no continuity, replace it with a new fuse of the same amperage rating.
Checking the dashboard light fuse is a quick and easy process that can save time and money. If the fuse is not the issue, further troubleshooting may be necessary.

Replacing the Fuse
When the dashboard lights fail to illuminate, replacing the fuse is often the solution. Here are the steps to follow:
- Locate the fuse box: The fuse box is usually located under the dashboard on the driver’s side or in the engine compartment.
- Identify the dashboard light fuse: The dashboard light fuse is usually labeled as “instrument panel” or “IP” on the fuse box cover.
- Remove the fuse: Use a fuse puller or pliers to remove the dashboard light fuse from the fuse box.
- Check the fuse: Hold the fuse up to a light source and check if the metal strip inside is broken. If it is, replace the fuse with a new one of the same amperage rating.
- Insert the new fuse: Insert the new fuse into the fuse box and make sure it is securely in place.
- Test the dashboard lights: Turn on the car and check if the dashboard lights are now working.
It’s important to note that replacing the fuse is not always the solution to dashboard light problems. If the new fuse blows immediately or the lights still don’t work, there may be an underlying electrical issue that requires professional attention.
Other Causes of Dashboard Light Failure
While a blown fuse is a common culprit for dashboard light failure, it’s not the only possible issue. Here are some other causes that could be preventing your dashboard lights from turning on:
Checking the Light Switch
The light switch is located on the dashboard and controls the headlights and dashboard lights. If the switch is not in the proper position, it could cause the dashboard lights to not turn on. Make sure the switch is in the “On” position and try turning the dimmer switch to see if that helps.
Inspecting the Wiring
If the wiring that connects to the dashboard lights is damaged or loose, it could prevent the lights from turning on. Check the wiring for any visible damage or signs of wear and tear. If you notice any issues, it’s best to have a professional mechanic take a closer look.
Replacing the Light Bulbs
Dashboard lights are powered by small light bulbs that can burn out over time. If the bulbs have burned out, they will need to be replaced. Refer to your vehicle’s owner’s manual to locate the bulbs and follow the instructions for replacement. Keep in mind that some bulbs may be difficult to access and require special tools to replace.
It’s important to note that dashboard light failure can also be caused by more serious issues, such as a malfunctioning alternator or battery. If you’ve checked the fuse, light switch, wiring, and bulbs and still can’t get the dashboard lights to turn on, it’s best to have your vehicle inspected by a professional mechanic.
Conclusion
When the dashboard lights fail to work, it is often due to a blown fuse. The dashboard lights fuse is an essential component of the electrical system, and it protects the circuit that powers the dashboard lights.
As seen from the search results, the dashboard lights fuse is usually located in the fuse box, which is either under the car’s hood, beneath the dashboard, or close to the glove compartment. It is labeled as “Dash Lights” or “Interior Lights.”
If the dashboard lights fuse blows, the electric power cannot reach the lights, even if they are otherwise in good operating order. In such cases, it is important to find out which fuse is responsible for the dashboard lights and replace it with one with an appropriate amperage rating.
It is also important to check the owner’s manual before attempting to replace a fuse. The owner’s manual provides a diagram that specifies the “Dash Lights” or “Lights” fuse. If the fuse is too weak or too strong, it can cause further damage to the electrical system.
Therefore, it is recommended to consult a professional to have the dashboard lights fuse replaced. They can also diagnose and fix any underlying issues that may have caused the fuse to blow in the first place.


